The book, My School Tools introduces one tool a day for 6 days: pencil, crayons, map pencils, markers, scissors, and glue.
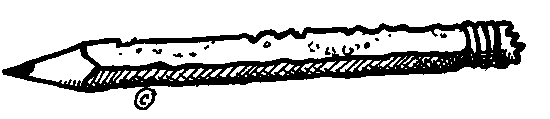
Page One: Pencil
Teach the phrase... 3 Fingers to Write. Demonstrate how to hold a pencil with 3 fingers. Have the children practice doing the same.
Model Pick & Flick. Have the children lay their pencils on the table. Pick the pencil up and flick the eraser toward the hand until it rest on its pillow (the fat,squishy part of the hand).
Have the class practice holding the pencil with 3 fingers and pick and flick. I actually have the kiddos repeat these phrases while doing the action. It seems to helps those that are not already holding a pencil correctly.
After practicing for several minutes, explain that... Pencils are used for writing words and doing math. Pencils are not used for coloring.
Have each child color the pencil. Then, have each child use a pencil to write his/her name on the line. Once the entire class has completed the page read the page aloud point word to word as you read. Locate and highlight the word "I".
Below is an example of the page for the first day of school.
___________
Write your name on the line.
I can use a pencil.
Page Two: Crayons
Follow the same procedures as before. Except explain that... Crayons are used for coloring large areas.
Have the children color the crayons on the page. They should only color the larger areas with crayon. The will not color the rest of the page.
Once the entire class has completed the page read the page aloud point word to word as you read. Locate and highlight the word "I".
Page Three: Map Pencils
Follow the same procedures as before. Except explain that... Map pencils are used for coloring small areas.
Have the children color the map pencils on the page. They should only color the smaller areas with map pencil. They will color the larger areas with crayon. Refer to yesterday's lesson.
Once the entire class has completed the page read the page aloud point word to word as you read. Locate and highlight the word "I".
Page Four: Markers
Follow the same procedures as before. Except explain that... Markers are used for outlining.
Demonstrate how to outline and object.
Have the children outline the marker on the page. They should only outline the marker. They will color the rest of the page with crayon and map pencil according to the rules learned.
Once the entire class has completed the page read the page aloud point word to word as you read. Locate and highlight the word "I".
Page Five: Scissors
Teach the phrase.. Thumbs Up to Cut. Have the children practice holding the scissors with their thumb toward the ceiling.
Teach the phrase... 3 Fingers to Cut. Demonstrate how to hold the scissors with 3 fingers. Have the children practice doing the same.
Now, explain that when you cut with scissors you will have to have your thumb up and be using 3 fingers.
Have the children practice this on scrap construction paper.
Have the children glue a couple of pieces of cut paper onto the booklet page. They will color the rest of the page with crayon and map pencil according to the rules learned.
Once the entire class has completed the page read the page aloud point word to word as you read. Locate and highlight the word "I".
Page Six: Glue
Teach the phrase... Just a Dot. Not alot. and Too much glue makes a mess on you.
Demonstrate how to open and close the glue. Have the children practice several times.
Allow the children to practice making glue dots on scrap paper. Once the children have done this to your liking allow them to color the box of crayons following the coloring rules. Finally, the picture should be cut out.
Have the children glue the picture onto the front cover of the book while repeating the phrases... Just a dot; not alot. Cause too much glue makes a mess on you.
Once the entire class has completed the page read the page aloud point word to word as you read. Locate and highlight the word "I".
Notes For Just for You:
- On day five, I do a lesson about quality work using the book, The Dot. It allows the children to sue the first four tools for practice. Kind of like a mini review. Look for lesson coming soon.
- We reread this mini book for several weeks. On day seven, we locate, read, and highlight the word "can" on each page.
I love that phrase! I will use that tons, I am sure.
ReplyDelete