Showing posts with label math. Show all posts

Sunday, September 18, 2011

3D Shapes

Teaching 3D shapes in kindergarten is always a challenge for me.  We begin my creating a picture dictionary. 


I give the children a table with the 3D shapes on it and a place to write the name for each shape.  The children are responsible for copying environmental print in order to fill in their own dictionaries. 

During the unit, we play several games.  Below you will find some of our favorites:

  • Can You Guess My Name:  Say a riddle such as... I have a curved side.  Let the kids guess.  I look like a ball.  What am I?  a sphere.  Show the shape.    Always start with the vaguest clue and get more specific as you give more clues.
  • Find a __:  say the name of a 3D shape.  Have the children travel around the room to locate the specified shape and point to it.  Continue until interest wanes.

At the end of the week, we go on a shape walk to locate 3D shapes in our environment.  This time I will point out that most of the shapes we see are 3D shapes, but they have similarities to the 2D counterpart.

During this walk, the children sketch drawings of their objects in a math journal.  When we return to the classroom, the drawings will be outlined in black felt pen and colored.  Once the drawings are complete the children will label each drawing using a pencil.

The Shape Walk

Shapes are all around us.  We see shapes everywhere we go.  To teach shapes to little ones, you only have to go as far as the outdoors.

The Shape Walk
With so much time spent using electronics and indoors nowadays, getting the kiddos outside as much as possibly is a high priority for me.  So, we begin our unit with a shape walk. 

Before going outside, I show pictures of the shapes we will be looking for... circle, oval, triangle, square, and rectangle.  Then, we head outdoors. 

As we take our walk, I allow the children to take turns snapping pictures of the various shapes we encounter.  At a later time, these pictures can be used to create a photo story.

When the children locate shapes, I make sure they are using the appropriate vocabulary to identify it.  If not, I provide gentle reminders as needed.

When we return to the classroom, each child receives a 4 X 4 piece of white and draws his/her favorite shape from our walk.  We then use the pictures to graph the shapes.

Shape Sort

Toward the end of our unit on shapes I introduce the children to sorting.  We sort by color, shape, and size.

I have a set of shape cards that are printed on 3 different colors of card stock.  I laminated them and cut them out to use in the pocket chart.

First, we practice sorting in the pocket chart whole group.  Once the class gets the hang of it we begin sorting through "silent teach".  The kids love this!!

Explain silent teach to the class by saying the following: 

Today we are going to practice sorting in a very fun way.  Silent teaching is when you learn through watching and doing without talking.  I will place this card (a picture of a stop sign would work great) in the pocket chart.  It means there is no more talking until I take the picture out again.


I am going to place several cards in the pocket chart and you will have to try to figure out where the next card needs to be placed.  After several turns, I will hold out a sorting title (color, shape, or size) and someone will have to label our sort.  We will do this several times.


Remember that the stop sign placed in the corner of the pocket chart means NO talking.  I will point to you when it is your turn to come up to the chart.  Let's begin.

You will do exactly as explained above.  Change up the sorts several times and make sure to allow each child at least one chance to come up and participate.


After sorting through silent teach, give the children a set of shape cards.  Have each child figure out a way to sort his/her cards. 

I try to pass out 3 different varieties (one for each... color, shape, and size).  This way the children are not looking at their neighbors and I can get a more authentic representation of what each child knows.

Sunday, September 11, 2011

Counting Dots Game

I needed a quick math game to fill some time one day.  My lesson just didn't take as long as expected.  The kiddos really liked playing the following game.

Directions...

1.Place a bucket of linking cubes and a pair of dice on each table.

2.  The first player will roll the dice and count the dots.  Then, he/she will collect corresponding number of cubes. 

3.  The next player will do the same.

4.  Play continued in this manner until one of the players has reached 30 cubes or 3 sets of tens.

*NOTE*  If needed, use one die and play til a player reaches 15.

Saturday, September 10, 2011

Math Exploration

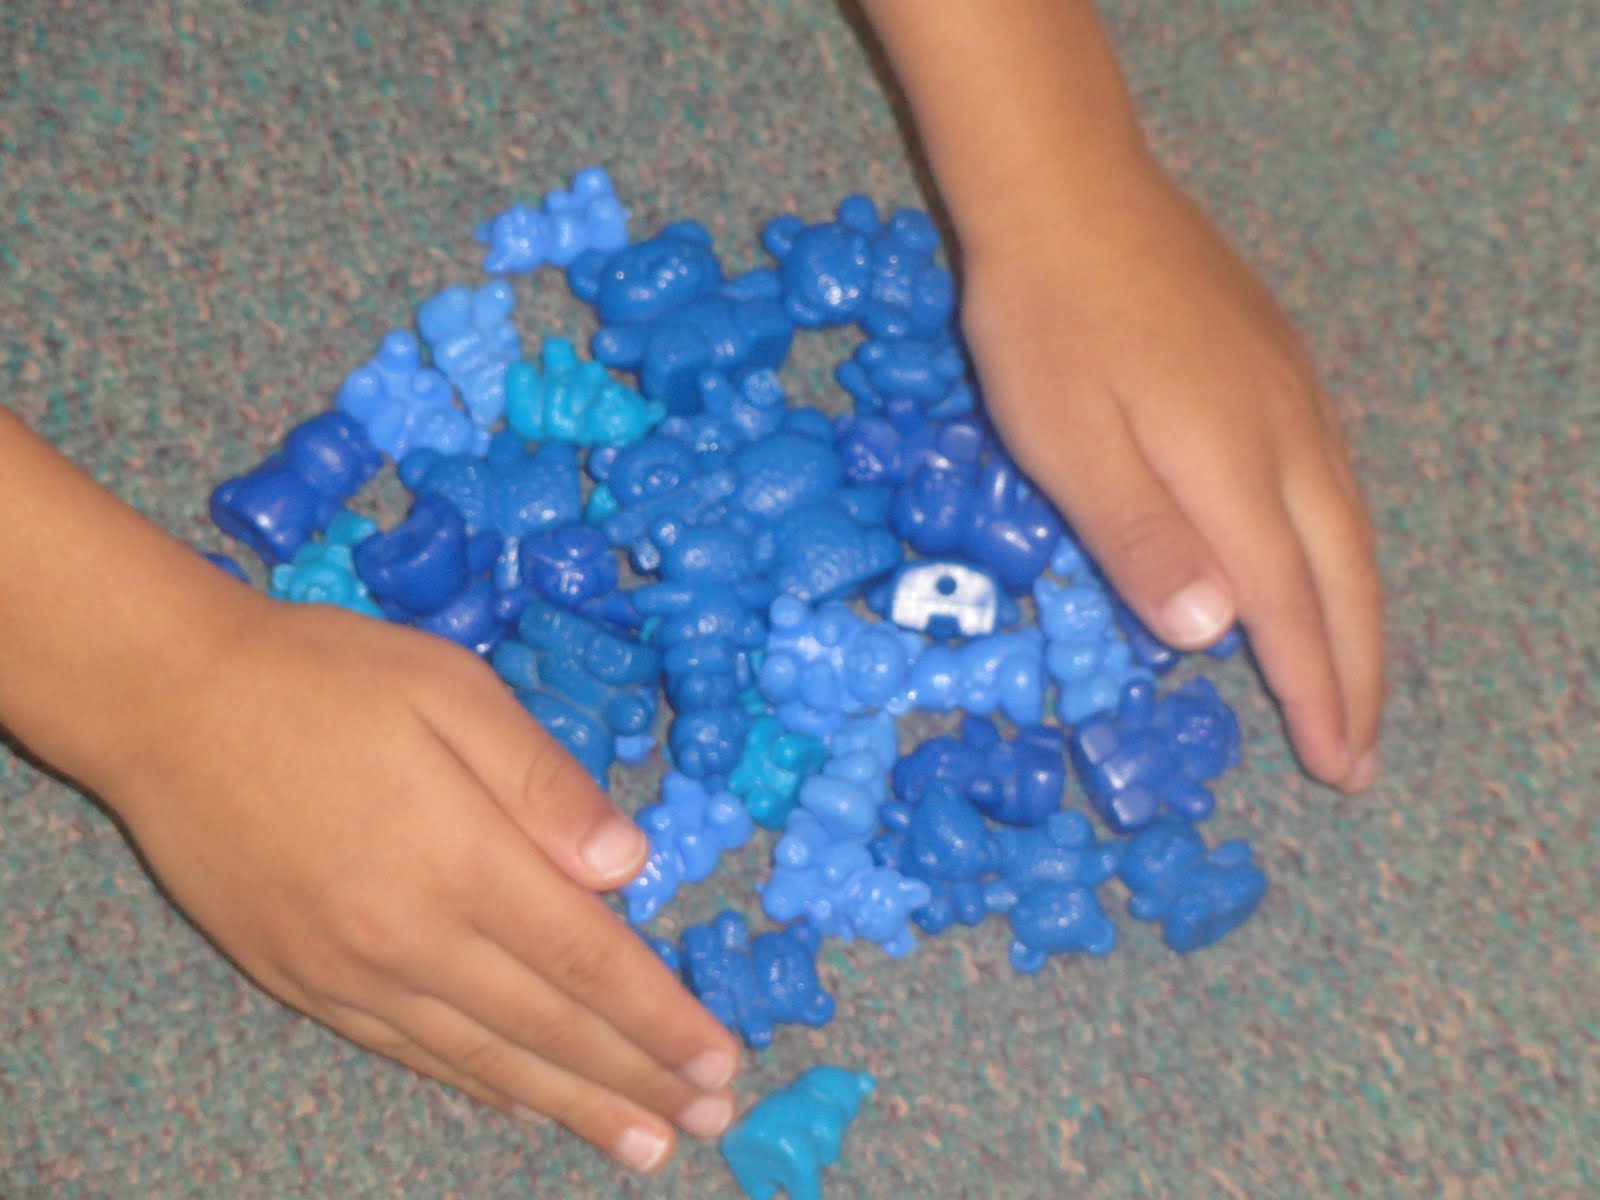
 The first three weeks of school are dedicated to exploring and playing with our math tools.  Letting the kiddos have free reign with the tools before we begin our formal learning really cuts down on the playing when it's time to get down to business.

Favorite Items for Exploration:
  • buttons
  • plastic animals
  • legos
  • pom-poms
  • hot wheel cars
  • plastic alphabet letters
  • ribbons
  • gems
  • glass stones
  • barbie shoes
  • linking cubes
  • linking shapes
  • teddy bear counters
  • bottle caps
  • etc.

The options are endless and the planning is non-existent for the first 3 weeks of school.  Gotta love that!

Simply rotate the kidlets through a series of stations for 10-20 minutes at a time.  I usually choose 5 different buckets a week with the last week being a repeat of the 5 favorite stations from the previous 2 weeks.

Simple * Fun * & Full of Learning

P.S.  I take this time to do lots of kid watching and write down information about the kids I'd like to remember.  I also offer suggestions on how to play with the items and see who is able to do this will little guidance.  I guess you could say I use it as a pre-assessment of sorts.

Friday, July 15, 2011

GoGo Math: Part 2

Check out my previous post on GoGo Math to learn how to use GoGo's for addition and subtraction before reading this post.

Here's How To Play:

Write the numerals 0-20 on index cards and shuffle into a pile.  Lay the pile near the players face down.

Line up 10-20 GoGo's in a row on a hard surface such as a table top or hardwood floor. 

Select one of the GoGo's and flick it at the line up.  Try to knock down as many figurines as possible.

Count how many GoGo's are knocked down.

Draw a card from the numeral stack.

State if your # of GoGo's is greater than, less than or equal to the numeral on the card.  For example: you knock down 5 GoGo's.  The numeral on the card is 8.  You would state... 5 is less than 8.

It's that simple.

Thursday, July 14, 2011

GoGo Math


Ready for some math time fun?

This adding and subtracting game came about during a round of Jr. Monopoly I played with my 5 year old.  At the end of the game, he began flicking the toll booths with the die we used to play the game.  It reminded me of the GoGo's my boy so often play with. 

**GoGo's are small plastic figurines that are in a variety of colors and characters.  Each figurine is about 1 inch tall.  I could explain how to play with them, but that is not the focus of this post... .**

How to Play GoGo Math:

Gather about 20 GoGo's, lego men, littlest pet shop figurines, etc.  We used Monopoly toll booths, but I know the GoGo's would get alot more excitement at my house.  Oh, you will need one die as well.

**You can purchase dice with a variety of different numerals on them from your local teacher store.  If your child is a bit more advanced, you may want to choose a die with higher numerals.**

Once you have all you materials gathered line up the figurines in a row on a hard surface.  A table top or hardwood floor work really well.  Leave a small bit of space between each figurine.  Look at the photo for approximate spacing.

Next, your child will flick the die toward the figurines trying to knock over as many as possible.  Count the number of figurines that toppled over.  Add or subtract that number from the number rolled on the die.

The novice mathematician will more than likely have to touch each GoGo that toppled over and count out loud.  Then, he/she will touch the dots on the die to continue the count.  It will be very similar for subtraction... touching the objects and physically removing the ones that are to be subtracted.

The intermediate kiddo might need to roll two dice toward the figurines and add the numbers rolled and then add or subtract the number of figurines that toppled over.

The more advanced kids could roll a single die and multiple the two numbers... the one on the die and the number of figurines that toppled over.

The variations are really endless.

I guess that is it.  Have fun with this natural learning variation of a popular kids game.

**Addition**
After I wrote this post, I played the game with my youngest.  He didn't want to use a die.  He flicked one of the GoGo's (as per the real game) at the line up.  Then, he added the number of figurines that fell to the number that were still standing.  This is a great example of practicing decomposing numbers.

You could subtract without a die as well.  Once you have flicked some of the GoGo's over remove them from the line up.  State the process orally... 20 GoGo's minus the 4 GoGo's that fell equals 16 GoGo's.  This will be a great introduction to word problems as well as still decomposing the number 20.

Man, if kids aren't sometimes wiser than their years!

Thursday, October 21, 2010

Shapes Are Everywhere

This week my class used straws to make 2D and 3D shapes. The children were asked to make squares, triangles, rectangles, and rhombuses (diamonds).


The challenge... to make a pyramid, rectangular prism or cube. The challenge was on as excitement was building. At first, I got only 2D shapes: rectangles, squares, rhombus.


I suggested the use of a stapler and the creativity began. Rectangular based with line segments from each corner. Rectangular tops. Is that a rectangular prism I see? I look over and I have shape chains. The chain contains tons of 2D shapes all strung together.


Buzzz.....Buzzzz.....Buzzzz..... Can you hear the excitement?

I think the buzz was heard all the way down the hall.


How Do You Make Straw Shapes:

1.Show the children several different examples of any shape made out of lines... older kiddos can be shown both 2D and 3D shapes.

2.Give each child a large handful of straws.

3.Demonstrate how to pinch the end of the straw together and insert it into the opened end of another straw.

4.Allow your child to bend and attach straws to make as many shapes as possible.

5.Shapes can even be linked together for another fun alternative.

6.Older children can use tape or a stapler and experiment with creating 3D shapes like cubes and rectangular prisms.

No straws on hand... experiment with using toothpick and marshmallows. The added bonus... getting to eat the shapes when you are done playing!


Ocean Counting Book

image from amazon.com

I read George's Store at the Shore by Francine Bassede. It is a simple book about a duck named George and his cat setting up a beach side store. Children quickly realize that it a counting book. After reading the story, we made our own counting books. My example is below.

Decide how long you want the book to be and write the title, __'s Store at the Shore by __. Have your child decorate the front cover to look like a day at the beach.

I used a repeated phrase for the text in our book, so that the children could easily remember the text and begin to use one-to-one pointing to read the words. The phrase we used was... I have __ _____s at my store.

For kindergarten, I allowed the children to write the text and decide on a counting sequence (counting by 1s, 2s, 5s, or 10s). For little ones, you would need to write the text for them.

As for the illustration, we wrote a big numeral on the page corresponding to the number of items to be drawn. The children then drew that many items on the page. For little ones, I would use stamps or stickers for the illustrations. I love using stickers because of the novelty and ease of use by kids of all ages.

After the book is completed, point to the words as you read the book to your child. If your child is able, have him/her point to the words as you read. The next stage would be to have your child take over the reading and point to the words as well. At a young age, your child will be doing the reading by memory... which is perfect by the way. Praise all efforts and assist as needed. The repeated reading from memory will quickly place some of the words from the text into your child's memory word bank. Before you know it, your child will be able to read one or two of the words in other contexts as well.

Happy Learning!


Piggy Bank Bonanza

My boys are fascinated with their piggy banks lately. I took advantage of this opportunity to get in a little natural learning.

Here are some of our discussions and activities:

•who has more money? less money? how do you know for sure?

•what is the name of this coin? what color is it? how much is it worth?

•how many __ do you have? do you have more __ or __? how do you know? prove it to me? which coin do you have the least amount of? are any of the coins "equal"?

•what do you notice about the coins?

•how are all the quarters the same? different? how are all the nickels the same? different?

•what is similar between a penny and a dime?

•sort by color, size, back design, etc.

•coin patterns

•coin rubbings

•coin book with a rubbing of the front and back of each coin, coin name labeled and the amount written in cent notation.

If you have any additional coin activities that you would like to share, please leave a comment and I will add them to the post. Have fun exploring money with you little ones.

TeachMama has made some additions to my post that you will truly love.

Counting Coins

Spend, Save, Give.

Thank you Amy for such wonderful kid friendly ideas. I will be heading out to IKEA soon for some jars ($1.99 each) of my own.


Sticker Patterns

[IMG_6573.jpg]
When I was switching classrooms at the beginning of June, I found quite a few stickers and brought them home. Yesterday JJ wanted to put them in his writing notebook. Before I let him just have at it, we had a mini lesson on patterning. Nothing formal... I just wanted to access how well he could complete an AB pattern and the more complex AAB pattern. I was so pleased with how well he did. This was our first time trying to pattern together, so next time should be even better.

Procedures:

1. Take out the stickers and any paper you would like to stick them to.

*We used a notebook we got at the $1 spot at Micheal's. I always stock up on these.*

A pattern is anything where you can predict what will come next. But in this case, I wanted to use the more common definition. A pattern is something that repeats more than once.

2. Begin an simple AB pattern on the paper with the stickers. For example: football, basketball, football, basketball.

3. Touch each picture and say the name (football, basketball, football, basketball).

4. Repeat this and have your child say the names of the stickers with you.

5. Ask you kiddo if they notice anything about the order of the stickers. If they do not notice that the stickers repeat in the same order, point this out.

6. Ask your child to name the sticker that comes next. Allow him or her to actually place the sticker in the correct location.

7. Repeat steps 3-4 adding at least one more sticker.

*If you have an older child that needs a challenge, have him/her not only extend the end of the pattern but add on to the beginning of the pattern as well. This is a much more difficult concept.*

8. Repeat all steps with a different kind of pattern. We completed an AAB pattern. For example: soccer ball, soccer ball, football, soccer ball, soccer ball, football.

This activity took maybe 5 minutes and I was able to access that JJ is ready to begin experimenting and playing with patterns. Next time, I am going to use coins. He is still infatuated with them, so patterning the coins will be that much more fun and engaging.

Happy Learing!

Oh, one of my favorite things to pattern with are old buttons. You can usually buy containers of random old buttons at a local craft store. Kids love playing with them. They are great for sorting as well.


What Comes Next?

Another game I played with JJ this week was sequence. I bought a set of sequencing cards from Lakeshore. I chose the one for ages 3+.

Here is what we did:

1. We looked at all the pictures and sorted them into themes. There are several themes in one box. Some examples are riding a bike, throwing a stick for your dog, etc. each theme has 3 pictures in its sequence.

2. JJ chose the theme he wanted to place in order.

3. I touched each picture and said a sentence out loud that described the picture. For example: the girls are putting on their helmets.

4. Next, I asked Little J to tell me which picture goes first in the sequence. He picked up that picture and placed it in front of him on his left (the direction we read and write).

5. I continued to ask JJ which comes next and he continued to pick up the picture and place it next to the previous picture moving left to right.

6. Then, Little J touched each picture and told the story to me. For example: The girls get their helmets. They get on bike. They are riding their bike.

7. Finally, I touched the pictures and told the story aloud using correct grammar. I made sure to ask JJ if there was anything I left out and if he thought the story made sense.

Above you can see how Little J lined up his cards just so. He really wanted everything to be "perfect." I am really baffled by this cause no one else in the family seems to be as much of a perfectionist as JJ. BUT... it is a good quality to possess. Maybe I should take a few lessons. I'm just a mess. Anyways...

If your child is ready for writing, have him/her write a sentence to go with each picture. Even if he/she is not yet writing, you can start if your child knows the letter sounds.

Here is What You Should Do:

•Say each word slowly.

•Ask your child what sound they hear at the beginning of each word. Have your child only record the beginning sounds for each word in the sentence. No need for spacing at this point.

•Applaud their effort.

•Be sure though to remind your child that he/she is just learning to write and what he/she did is perfect. You however know how to spell the words because you have been writing for a very long time.

•Write the words correctly under your child's writing.

•Have him/her touch the words as you read the sentences aloud.

Have fun.
Read more...

Game of Nim

Wow! While I was cleaning out my purse today, I found a clipping from a Highlights Magazine explaining how to play the game Nim. The game uses alot of problem solving and logic, so I decided to play it with a kindergarten student that I tutor.

How to Play:

•Have your child find 15 small things—for example: buttons or coins.

•The first player will take one or two "buttons" away.

•Each player will take turns doing this.

•The loser is the player who takes the last button.

Note: You can give the game a twist by using a different number of objects or by taking away different amounts. Also, you can have the winner pick up the last item instead of the loser.

Above is the 21 coin circle that we used to play Nim. We were able to take away 1, 2, 3, or 4 coins. The player who had to take the last coin lost.

Questions to Ask During and After Play:
*Based on a game were you pick up either 1, 2, 3, or 4 items... and the loser is the player who picks up the last item.*

•Is this game fair regardless of who goes first or second?

•How many circles do you need your opponent to leave you to ensure that you will win? (2, 3, 4)

•What strategy did you use during this game?

•How would your strategy change if the number of items you could pick up changed?

I went and looked up Nim online and found that it is actually very mathematical based. Stuff that even as a teacher I didn't understand. I found a research paper/thesis on one site. Here are some of the higher level actives they used to engage the students.

Activity 1:

Understanding the Game: making pairs to try to find ways of winning the game

•You will need 20 snapable units of yellow.

A teacher could use unifix or snap cubes. At home, legos would work well.

•You will need to add one black unit to the end.

•Students alternate turns taking from one to three cubes. The student who takes the last cube is the winner.

Activity 2:

Modifying the Game: Students are assigned to modify the game by changing or adding some conditions to the rules of the game.

1. Present an example of a new game modified by one student.
•Place a black-colored cube at the center with 7 yellow cubes connected on its left side, and 13 red cubes on its right side.

•Students take turns removing from one to three cubes of the same color. They may take cubes from either the right or left side.

•The student who takes the black cube will be the loser.

2. Discuss the demonstrated game.

3. Students make their own modified versions of the game.

Note: Showing children the modified version will get their minds working and thinking about other alternatives to the directions. They will be engaging in high level problem solving and logic.

*Most of the research I found was based on children in middle school and high school. I really do not see why this game would not be perfect for even preschoolers. Just modify the number of items to 5 or 10.

Read more...

Wednesday, October 20, 2010

Snap It

You will need 10 items that snap together if possible. At school, we use unifix cubes. At home, you could use legos of different colors.

If you do not have anything that snaps together, just gather 10 small items such as pennies. You would then need to alter the activity by placing the items in a line on a flat surface and removing items from that line.

Directions:

1. Count the ten cubes with your child. If this is too many, start with 5 items instead.

2. Explain that you will be taking away some of the cubes and placing them behind your back. Your child will get to see the remaining cubes.

3. Your child's job is to figure out how many cubes you removed and placed behind your back.

4. Your child will need to view the items that are remaining to deduct the answer.

*REMEMBER: It is always important to have children explain their thinking. Ask, how did you figure out how many cubes I have behind my back? How do you know that is the answer? ETC.

Money Sort


T Man and Little J love to play with coins. One day I noticed JJ placing the coins in piles. Being a teacher, I decide it was the perfect opportunity for a little learning.


I quickly took out 4 recycled butter containers and wrote the name and value of the coin on the lid.


Then, we worked as a team to sort the coins into the correct piles.


Next, we counted some of the coins and looked at features on each coin.

Finally, we placed the coins into the appropriate containers.

Later in the day T Man decide to sort the coins even further. He looked at the coins and started sorting them by the year. He decide that was too many piles and sorted them by decades instead. he also sorted the coins by what was on the backs of the coin. He had noticed that quarters had tons of different things on the back of them.

All in all this was a really fun activity that they continue to do today.


Friday, March 26, 2010

Seasons as a Sequence

Read a book about the seasons and brainstorm some activities for each of them. Talk about the seasons being a pattern that continues on and on and never stops... they are a cycle.

To show this seasonal pattern, make paper chains:

green (spring)
yellow (summer)
orange (fall)
blue (winter)

On each of the colored strips, glue an item to represent the season.

spring (flower)
summer (beach ball)
fall (acorn)
winter (snowman)

Once the strips are finished attach them into a chain.  Work together to attach each person's chain into one longer chain.

This can be harder than expected for the little ones.

EXTENTION:

1.  Discuss the pattern.  Say the pattern over and over again while clapping to the rhythm.

2.  Look at the chain and discuss that one cycle of the seasons equals one year.  Try to figure our how many years are represented on the chain.

3.  Start a Nature Journal.  Go outside and sit quietly for 10 minutes.  Draw and/or write about your observations.  Try to included as many of the senses as possible. 

This is a great time to review/ introduce the senses as well.

4.  Choose a special tree in your yard.  Take a photo of the tree.  Sketch the tree.  Be sure to go back during each season and do the activity again.  Compare the photos and drawings.  How are they the same?  different?

5.  Place a variety of small objects in a tub.  Have your child practice creating patterns. 

There are many great items to use:
  • buttons
  • legos
  • beads
  • keys
  • beans
  • pasta (different shaped or dyed different colors)
  • etc.