Showing posts with label writing. Show all posts

Sunday, September 25, 2011

Autumn...

Lately, we have delved into a study of fall.  In Texas, we do not get to cherish the true beauty of this season.  We have to do alot of reading and researching to view the changing of the seasons  in all their glory.

Below you will find some of my favorite fall activities:

1.  The seasons make a pattern: fall, winter, spring, summer.

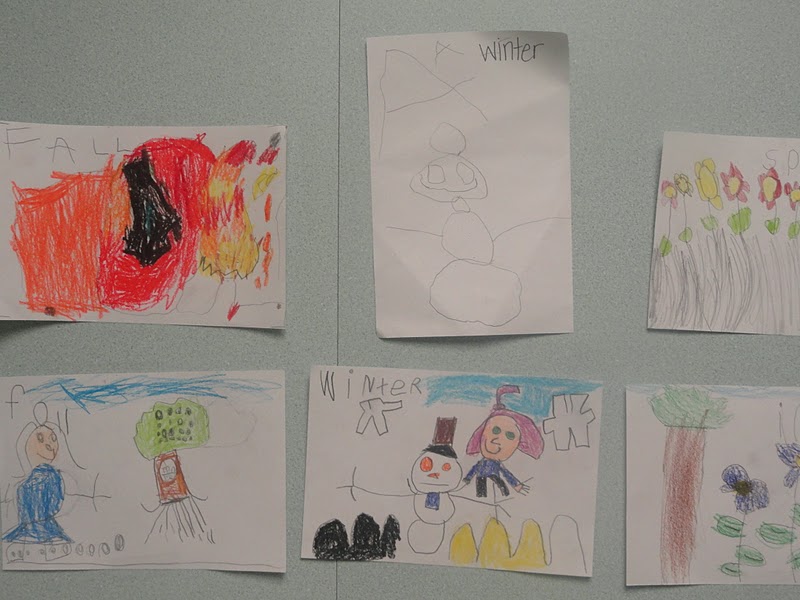
Each kiddo selects a season and draws a picture.  Then, we take all of our pictures and create a pattern of the seasons. 


2. Comparing summer and fall. 
Below is a chart the class and I made together.  Sometimes, I do a venn diagram instead.

3.  Seasonal Trees
We made summer trees with lots of green leaves.  The children had to unscramble the letters in the word summer and place the letters side by side to make a word.

This was 2 lessons:
1.  what a summer tree looks like
2.  a word is a group of letters with no spaces between them.

We will create a tree for each season by the end of the year.  I will post our fall trees soon.

4.  The children wrote a goodbye to summer listing the activity they had the most fun doing.
We brainstormed tons of summertime activities before beginning the writing activity below.  The children had to share what they were going to write with a partner in a think-pair-share before beginning.  Then, the children had to prewrite by drawing an illustration of the activity in full color.  Finally, the children had to sound out their words and try to record a beginning and ending sound for each word in the sentence.


I will post the fall equivalent soon... Hello, Fall! I will have fun__.

5. We learned several things about fall and charted our learning:
  • different activities
  • kind of clothing worn
  • how the weather should change
  • & other characteristics the children may not have already known.

Books to Consider for Your Lessons:

Click directly on the book to take you to its amazon page.
Fall (First Step Nonfiction)
How Do You Know It's Fall? (Rookie Read-About Science)
When Autumn Comes

Here are documents I used for my lessons:

Goodbye, Summer! Hello, Fall!  ... for some reason google docs is not recreating the document exactly right.  There should be no space after the "I will have fun" on the second section.  If you know what I am doing incorrectly, please let me know.

Summer Word for Summer Tree... Not saving as a PDF.  How can I do this?  It is changing all my fonts.  Think that might be my orginal problem as well.

Fall Word for Fall Tree

Monday, August 15, 2011

Introducing Writing Tools

It's beginning of the year AND it's kindergarten.  With that being said, I needed an easy way to teach how to use writing tools, scissors, and glue.  Since I love mini books I set out to create something simple, yet effective.

The book, My School Tools introduces one tool a day for 6 days: pencil, crayons, map pencils, markers, scissors, and glue.

Page One: Pencil
Teach the phrase... 3 Fingers to Write.  Demonstrate how to hold a pencil with 3 fingers.  Have the children practice doing the same.

Model Pick & Flick.  Have the children lay their pencils on the table.  Pick the pencil up and flick the eraser toward the hand until it rest on its pillow (the fat,squishy part of the hand).

Have the class practice holding the pencil with 3 fingers and pick and flick.  I actually have the kiddos repeat these phrases while doing the action.  It seems to helps those that are not already holding a pencil correctly.

After practicing for several minutes, explain that... Pencils are used for writing words and doing math.  Pencils are not used for coloring.

Have each child color the pencil.  Then, have each child use a pencil to write his/her name on the line.  Once the entire class has completed the page read the page aloud point word to word as you read.  Locate and highlight the word "I".

Below is an example of the page for the first day of school.


    ___________
                             Write your name on the line.

        I  can use a pencil.

Page Two: Crayons
Follow the same procedures as before.  Except explain that... Crayons are used for coloring large areas.

Have the children color the crayons on the page.  They should only color the larger areas with crayon.  The will not color the rest of the page.

Once the entire class has completed the page read the page aloud point word to word as you read.  Locate and highlight the word "I".

Page Three: Map Pencils
Follow the same procedures as before.  Except explain that... Map pencils are used for coloring small areas.

Have the children color the map pencils on the page.  They should only color the smaller areas with map pencil.  They will color the larger areas with crayon.  Refer to yesterday's lesson.

Once the entire class has completed the page read the page aloud point word to word as you read.  Locate and highlight the word "I".

Page Four: Markers
Follow the same procedures as before.  Except explain that... Markers are used for outlining.

Demonstrate how to outline and object.

Have the children outline the marker on the page.  They should only outline the marker.  They will color the rest of the page with crayon and map pencil according to the rules learned.

Once the entire class has completed the page read the page aloud point word to word as you read.  Locate and highlight the word "I".

Page Five: Scissors
Teach the phrase.. Thumbs Up to Cut.  Have the children practice holding the scissors with their thumb toward the ceiling.

Teach the phrase... 3 Fingers to Cut.  Demonstrate how to hold the scissors with 3 fingers.  Have the children practice doing the same.

Now, explain that when you cut with scissors you will  have to have your thumb up and be using 3 fingers.

Have the children practice this on scrap construction paper.

Have the children glue a couple of pieces of cut paper onto the booklet page.  They will color the rest of the page with crayon and map pencil according to the rules learned.

Once the entire class has completed the page read the page aloud point word to word as you read.  Locate and highlight the word "I".

Page Six: Glue
Teach the phrase... Just a Dot.  Not alot.  and Too much glue makes a mess on you.

Demonstrate how to open and close the glue.  Have the children practice several times.

Allow the children to practice making glue dots on scrap paper.  Once the children have done this to your liking allow them to color the box of crayons following the coloring rules.  Finally, the picture should be cut out.

Have the children glue the picture onto the front cover of the book while repeating the phrases... Just a dot; not alot.  Cause too much glue makes a mess on you.

Once the entire class has completed the page read the page aloud point word to word as you read.  Locate and highlight the word "I".

Notes For Just for You:
 
  • On day five, I do a lesson about quality work using the book, The Dot.  It allows the children to sue the first four tools for practice.  Kind of like a mini review.  Look for lesson coming soon.
  • We reread this mini book for several weeks.  On day seven, we locate, read, and highlight the word "can" on each page.
My School Tools Book

Sunday, July 10, 2011

6 Ways to Practice Name Writing

Name writing is an important skill for the beginning of kindergarten, but can be practiced from about the age of three.  Any activity that provides a tactile approach will draw a child into the activity.

  1. Rice and Sand Trays: Pour rice or sand into a shallow baking pan.  I actually prefer to use the 9X9 foil pans.  Write your child's name on an index card.  Have your child use his/her index finger to trace the letters in the rice or sand tray.  For those that are having trouble, you may want to place the index card in the bottom of the tray and have the child trace directly on the card.
  2. Shaving Cream:  Follow the same directions as for the rice and sand trays.
  3. Rainbow Writing: Parent writes the child's name in pencil or pen first. The child traces his/her name with crayons using correct letter formation. Do this 3 times using a different color each time. 
  4. Play Dough Words: Have your child roll play dough into the letters needed to spell his/her name. Place letters in the correct order. Read name. Orally spell name. Then, write name on a piece of paper.
  5. Magnet Madness: Have your child look at an index card with his/her name printed on it. Orally spell the word. Using refrigerator magnets, arrange the letters in the correct order to spell the word. Orally read and spell the word again.
  6. Chalk: have your child use a small broken piece of chalk to write hie or her name on a chalk board.  Use a tiny wet sponge piece to retrace the letters to erase them.
* Helpful Tip: Use broken crayons for handwriting practice.  The smaller pieces help your child grip the writing utensil properly.  

Thursday, October 21, 2010

What Comes Next?

Another game I played with JJ this week was sequence. I bought a set of sequencing cards from Lakeshore. I chose the one for ages 3+.

Here is what we did:

1. We looked at all the pictures and sorted them into themes. There are several themes in one box. Some examples are riding a bike, throwing a stick for your dog, etc. each theme has 3 pictures in its sequence.

2. JJ chose the theme he wanted to place in order.

3. I touched each picture and said a sentence out loud that described the picture. For example: the girls are putting on their helmets.

4. Next, I asked Little J to tell me which picture goes first in the sequence. He picked up that picture and placed it in front of him on his left (the direction we read and write).

5. I continued to ask JJ which comes next and he continued to pick up the picture and place it next to the previous picture moving left to right.

6. Then, Little J touched each picture and told the story to me. For example: The girls get their helmets. They get on bike. They are riding their bike.

7. Finally, I touched the pictures and told the story aloud using correct grammar. I made sure to ask JJ if there was anything I left out and if he thought the story made sense.

Above you can see how Little J lined up his cards just so. He really wanted everything to be "perfect." I am really baffled by this cause no one else in the family seems to be as much of a perfectionist as JJ. BUT... it is a good quality to possess. Maybe I should take a few lessons. I'm just a mess. Anyways...

If your child is ready for writing, have him/her write a sentence to go with each picture. Even if he/she is not yet writing, you can start if your child knows the letter sounds.

Here is What You Should Do:

•Say each word slowly.

•Ask your child what sound they hear at the beginning of each word. Have your child only record the beginning sounds for each word in the sentence. No need for spacing at this point.

•Applaud their effort.

•Be sure though to remind your child that he/she is just learning to write and what he/she did is perfect. You however know how to spell the words because you have been writing for a very long time.

•Write the words correctly under your child's writing.

•Have him/her touch the words as you read the sentences aloud.

Have fun.
Read more...

Wednesday, October 20, 2010

Writing and the Little Ones

I have tried and tried to corret my pragraph spacing, but it will not work. Sorry for the long confusing way it posted. This happens to me all the time and I have no idea why. This weeks Picnic Talk is all about writing.


This is my absolute FAVORITE subject to teach in kindergarten. I love watching the kids come in with such a wide range of skills (many not even holding a pencil correctly) and by the end of the year most are writing full blown stories.

Here are some links to information on my school blog about writing as well as my favorite site to get actual writing lessons.

•my writing beliefs


•developmental stages of writing


•six traits of writing

•Mrs. Meacham's Classroom Snapshots: You will love everything about this wonderful teacher's website. I have linked directly to her writing lessons. What I love about the lessons is that each lesson always begins with a read aloud. This is the perfect way to show kids that writing is meant for reading and that someone will eventually read what you have written.

I was actually just writing my first weeks lesson plans for my kinder class and thought this would be the perfect post for the Picnic Talk. Many of these lessons are adapted from Mrs. Meacham's site and the rest I have either create or picked up along my teaching career.

The first formal writing lesson is about all the ways people begin to write. I create a chart with examples to show the children.

Ways to Write: pictures, scribbles, words, sentences

We go over the examples of each of these ways of writing and I have the children talk about what kind of writing they can do. I make sure to explain that sometimes we do more than one of the ways of writing. It really depends on why we are writing in the first place.

After our discussion, I read Bunny Cakes by Rosemary Wells. Max and Ruby are making a cake for Grandma. Ruby keeps writing a list of words for the ingredients she needs and Max writes a scribbled line for the marshmallow squirters he wants. Every time Max takes the list to the store, the grocer gets what Ruby wants but never gets the marshmallow squirters. Finally, Max draws a picture of the candy and what do you know... he actually gets the marshmallow squirters. This is such a wonderful book to really begin a discussion on why some of the writing was more effective than the others and when we would use each kind of writing.

The first actual writing activity is open ended. I simple ask the children to write using as many of the different ways to write as they can.

Soon there after, I formally teach the children how to hold a pencil correctly. We learn the phrase... 3 Fingers to Write. I show each child individually how to bend the last two fingers in towards the palm of the hand and touch the other 3 fingers together as if pinching something. Then, I have the children place a pencil with the point facing towards their tummy. I ask each child to pinch the pencil right above the point with the 3 writing fingers. Once the pencil is pinched I show them how to flip it up and back (some will need to use the pointer finger of the other hand to do this) until the pencil rest on it's bed... the fleshy part between the thumb and the pointer finger. When I notice a kiddo not holding the pencil correctly, I say... 3 Fingers to Write & Put Your Pencil to Bed. Most will instantly correct the pencil grip and those that are unsure, I assist.

This writing activity is fun... Tri-fold Names. Fold a piece of white typing paper into 3rds like you do when placing it into an envelop... it will make a triangular tent if not pressed down. I write the child's name on the inside section that is flat against the table. The child will lay one of the other flaps on top of his/her name and trace the name with a pencil, crayon, or marker. The more fine motor practice needed the fatter the writing tool should be. The child should repeat for the remaining flap.

On the 3rd day, we review all the ways to write and practice holding our pencil correctly. Then, we read The Dot by Peter Reynolds. This book is about a little girl sitting in art class and having difficulty drawing a picture. The teacher finally asks the girl to draw a mark on the paper and sign it. The next day, the drawing of the mark is framed and hanging behind the teacher's desk. The girl looks at the mark she has draw and knows she can do even better. Throughout the rest of the story, the girl makes dots in a variety of ways. She finally holds an exhibit to showcase all her work. A little boy is admiring all of her dots. She asks him if he can draw and he makes a comment about not being able to even draw a straight line. She ask him to show her and then says... sign it.

After reading this book, we talk about the difference in the way we write compared to grown ups or people in other countries. I pose the question... do you think grown ups always wrote the way they write today? We come to the conclusion that the more we write the better we will get at writing.

Again, the children are just asked to write about anything they would like to. They will dictate their writing to me and I will write the sentence on their work.

After all of these lesson, I begin to teach the children how to...

• label pictures with beginning sounds

• stretch out words to record more than one sound

• count words in a sentence

• write at least one letter for each word in the sentence

• use a word wall to copy text, etc.

Check out my school blog, Buggie Bungalow for sites to help with pencil grip and handwriting. They will be listed under my language arts links.

If you have questions, please do not hesitate to ask.

Read more...


Saturday, July 24, 2010

What's in a Name?

It is always nice when an incoming kindergartner comes in already reading and writing his/her name.  This gives me an edge because I can use his/her name as a basis for letter and sound recognition. I can also praise the child for being both a reader and a writer.  I love the look on the kiddos' faces when they realize just how "smart" they are  for the first time. 

Simple Ways to Practice With Your Child's Name...

*Sequence the Letters: Working on sequencing the letters in your child's name is a great place to start.  I like to use magnet letters, letter tiles, or his or her name cut into individual letters from a piece of paper.

Place a handwritten copy of your child's name and the magnetic or tile letters into a storage container.  A ziplock baggie or school supply box work well.

directions:

1.  Have your child pull out his/her name plate and read it to you.  Place the name plate directly in front of your child on a flat surface. 
2.  Have your child practice pointing to the letters and saying the letter names. 
3.  Dump out the letters.  Have your child flip them all right side up and in the correct orientation to read them.
4.  Touch the first letter of your child's name.  Have him/her say the letter name.  If needed, supply the letter name for your child.  Ask her to locate the letter _ and place it in front of her.
5.  Continue in this manner until the entire name has been sequenced and spelled.
6.  Before picking up the letters, repeat step one.

*Note* If your child already knows the letter names, you can do this same activity working on letter sounds. 

Also, do not follow these steps every time as your child will become easily bored.  On fidgety days, simple hand the materials to your child and her put her name together.  Just for fun... nothing more.

*Fun Ways to Practice Writing a Name WITHOUT a Pencil:  Using a pencil is the final step to writing your name.  It is the outcome we all must achieve.  While your child journeys closer to his/her goal, have some fun when writing a name.

Use shaving cream on the counter or a metal cookie sheet.  I prefer non menthol.  It doesn't sting the eyes.

Pudding baggies get in some much needed practice and have the added benefit of becoming a snack when the activity is complete.  Pour a small amount of pudding into a ziplock and seal.  Get as much air out of the baggie as possible.  I double bag by inserting the first baggie upside down into the second one to ensure less mess.

Water painting is great fun on a sunny afternoon.  Hand your kiddo a bowl of water and paint brush and let her practice writing that name over and over again on the fence or sidewalk.

Use the pointer finger to practice writing your name in wet sand.  When you are done, use a bit of extra sand to create a fun beach themed picture.

Bath tub crayons are a must.  What could be better than practicing name writing while getting clean.

There are so many different ways to practice writing your name.  these are just some of my favorite kid-tested ways.

How to Hold a Pencil

At the beginning of kindergarten it is really important for a child to come in with some concept of what his/her name looks like.  Holding a pencil somewhat correctly is also a big plus.

When I teach young children how to hold a pencil, I have him/her lay the pencil facing away from the body.  I ask the child to pick up the pencil and use the pointer finger from the opposite hand to flip the pencil into position.  I make sure to point out that the three fingers gripping pencil are rounded.

After this is taught, I can simply say... PICK AND FLIP.  The child will automatically pick it up and flip it back into the correct position.

It is sometimes helpful to place a marker line around the pencil where the child needs to place his/her fingers.

pencil grip link

*TROUBLESHOOTING NOTES*

Rounding Fingers: Place a pom-pom in the space between fingers and pencil.  Make sure that your child knows to not smash the pom-pom. 

Pulling the Pencil Back Against Opening Between Pointer and Thumb:  Loop a rubber band around your child's wrist.  Make sure it is not too tight.
Take a second rubber band and thread it under the wrist band.  Place both ends of the rubber band over and around the pencil.  This will pull the pencil back into the correct position.

Click here to view a picture of using the rubber band as a grip assistance.  Scroll down to page 182.